Container Registry & Compute
This section covers Steps 13–15: building and pushing Docker images to ECR, deploying the OCR service on ECS Fargate, and deploying the Backend on Elastic Beanstalk.
Step 13: Create ECR & Push Docker Images
13.1 Create Repositories on ECR
aws ecr create-repository --repository-name smartinvoice-backend --region ap-southeast-1
aws ecr create-repository --repository-name smartinvoice-ocr --region ap-southeast-1
(Or manually via Console: ECR → Repositories → Create repository)
13.2 Authenticate Docker to AWS ECR
Replace <ACCOUNT_ID> with your 12-digit AWS Account ID:
aws ecr get-login-password --region ap-southeast-1 | \
  docker login --username AWS --password-stdin <ACCOUNT_ID>.dkr.ecr.ap-southeast-1.amazonaws.com
13.3 Build & Push Backend (.NET 9)
# Move into the API folder
cd SmartInvoice.API

# Build Docker image
docker build -t smartinvoice-backend .

# Tag to match the ECR repository
docker tag smartinvoice-backend:latest <ACCOUNT_ID>.dkr.ecr.ap-southeast-1.amazonaws.com/smartinvoice-backend:latest

# Push to AWS
docker push <ACCOUNT_ID>.dkr.ecr.ap-southeast-1.amazonaws.com/smartinvoice-backend:latest
13.4 Build & Push OCR Service (Python)
[!NOTE] The OCR image is large (~2–3 GB). Ensure a stable internet connection.
# Move into the OCR folder
cd ../invoice_ocr

# Build Docker image
docker build -t smartinvoice-ocr .

# Tag
docker tag smartinvoice-ocr:latest <ACCOUNT_ID>.dkr.ecr.ap-southeast-1.amazonaws.com/smartinvoice-ocr:latest

# Push to AWS
docker push <ACCOUNT_ID>.dkr.ecr.ap-southeast-1.amazonaws.com/smartinvoice-ocr:latest
[!TIP] If you get a “Permission Denied” error on push, verify that your IAM User has the
AmazonEC2ContainerRegistryFullAccesspolicy.
Step 14: Deploy OCR on ECS Fargate
14.1 Create ECS Cluster
Console: ECS → Clusters → Create
| Field | Value |
|---|---|
| Cluster name | smartinvoice-cluster |
| Infrastructure | Fargate only |
14.2 Create Task Definition
Console: ECS → Task definitions → Create new task definition
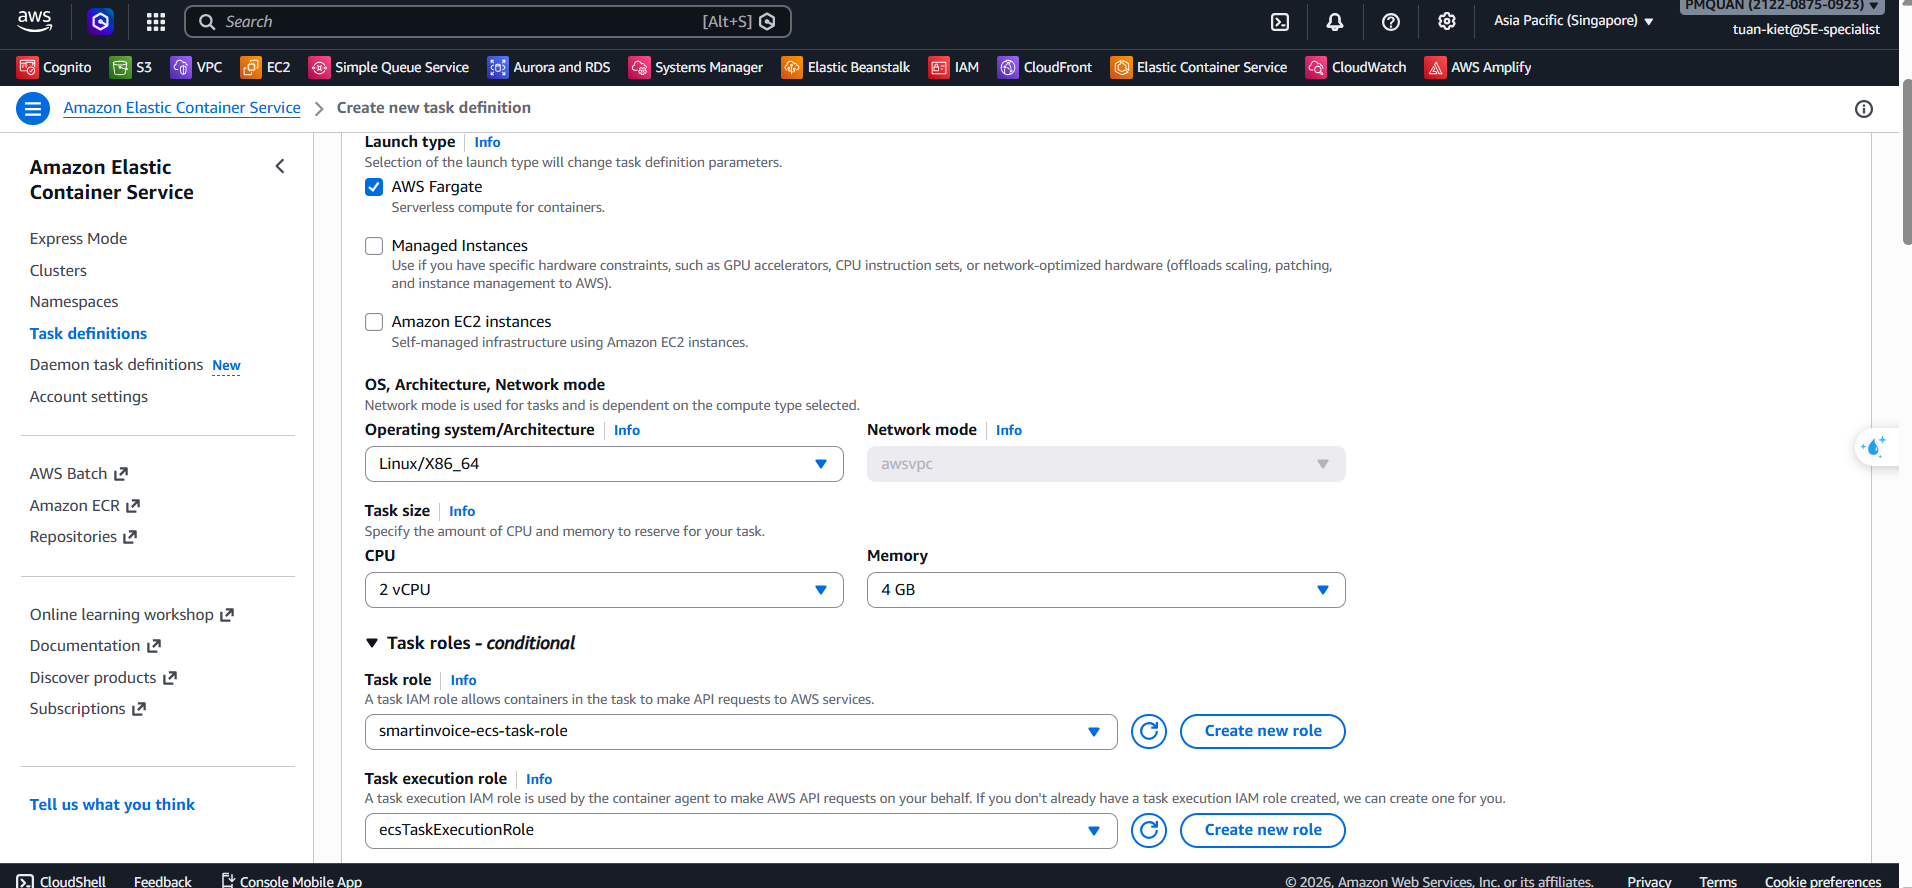
| Field | Value | |
|---|---|---|
| Family | smartinvoice-ocr-task | |
| Launch type | AWS Fargate | |
| OS/Architecture | Linux/X86_64 | |
| CPU | 2 vCPU | |
| Memory | 4 GB | |
| Task role | smartinvoice-ecs-task-role | |
| Execution role | ecsTaskExecutionRole | |
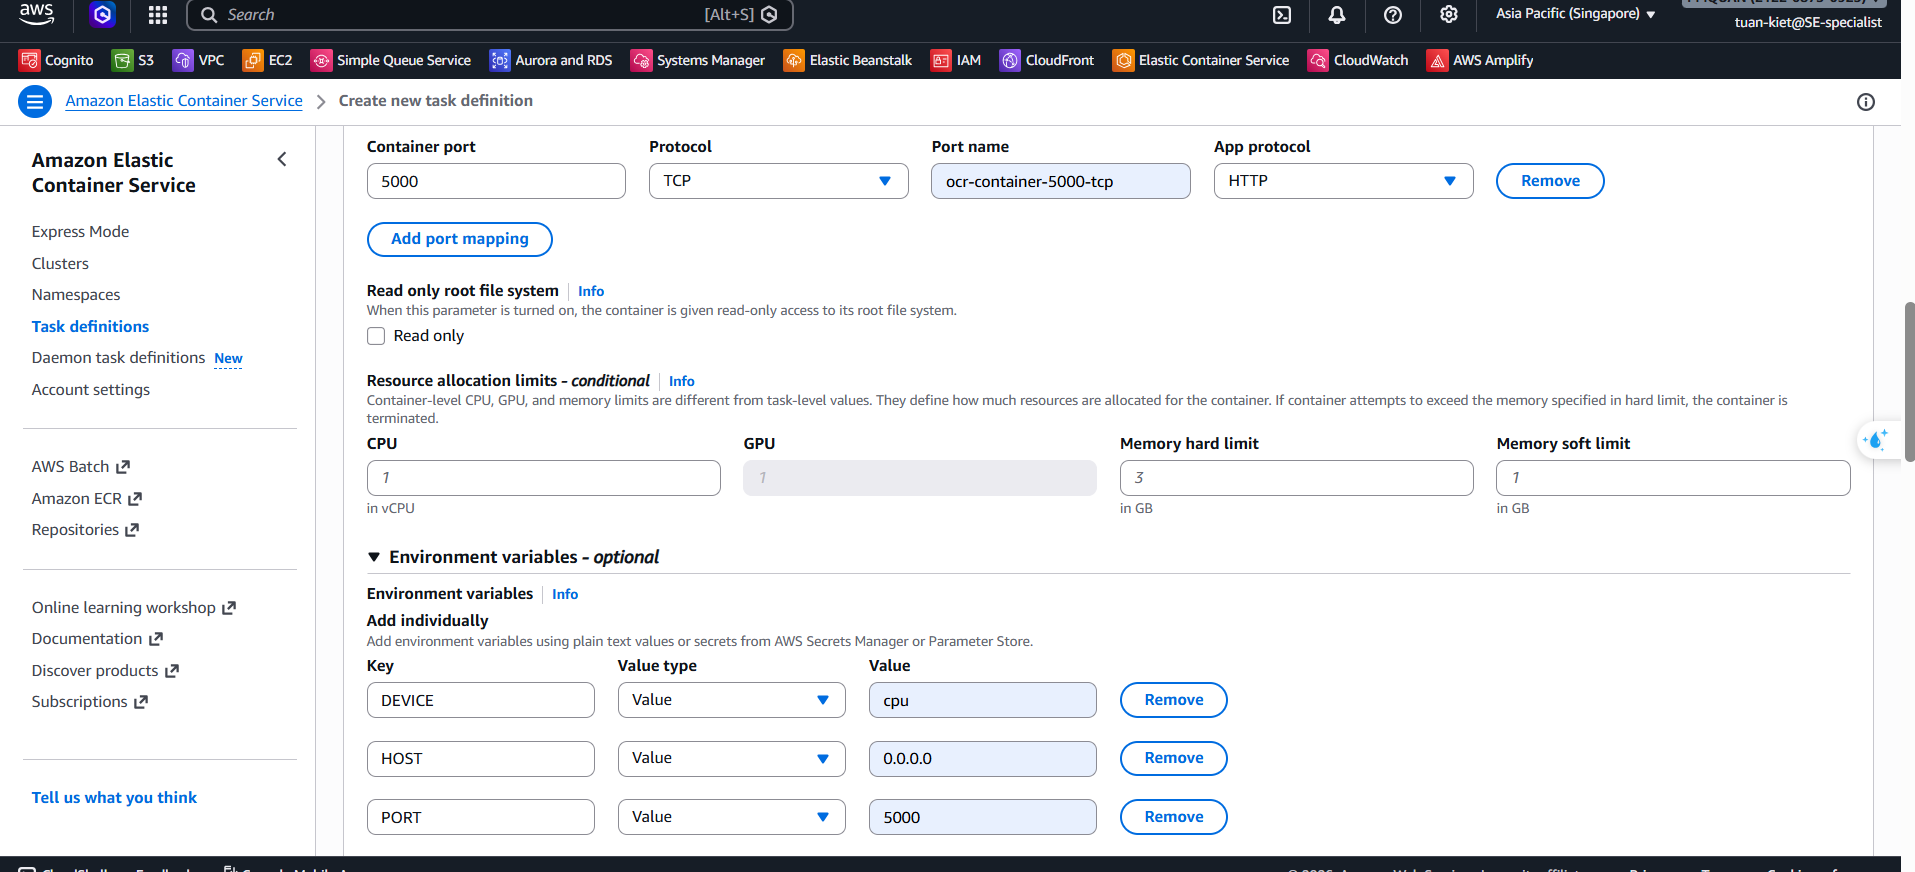
| Container name | ocr-container | |
| Image URI | ECR URI from step 13.4 | |
| Port | 5000 | |
| Environment | DEVICE=cpu, HOST=0.0.0.0, PORT=5000 | |
| Logs | awslogs → /ecs/smartinvoice-ocr-task | \ |
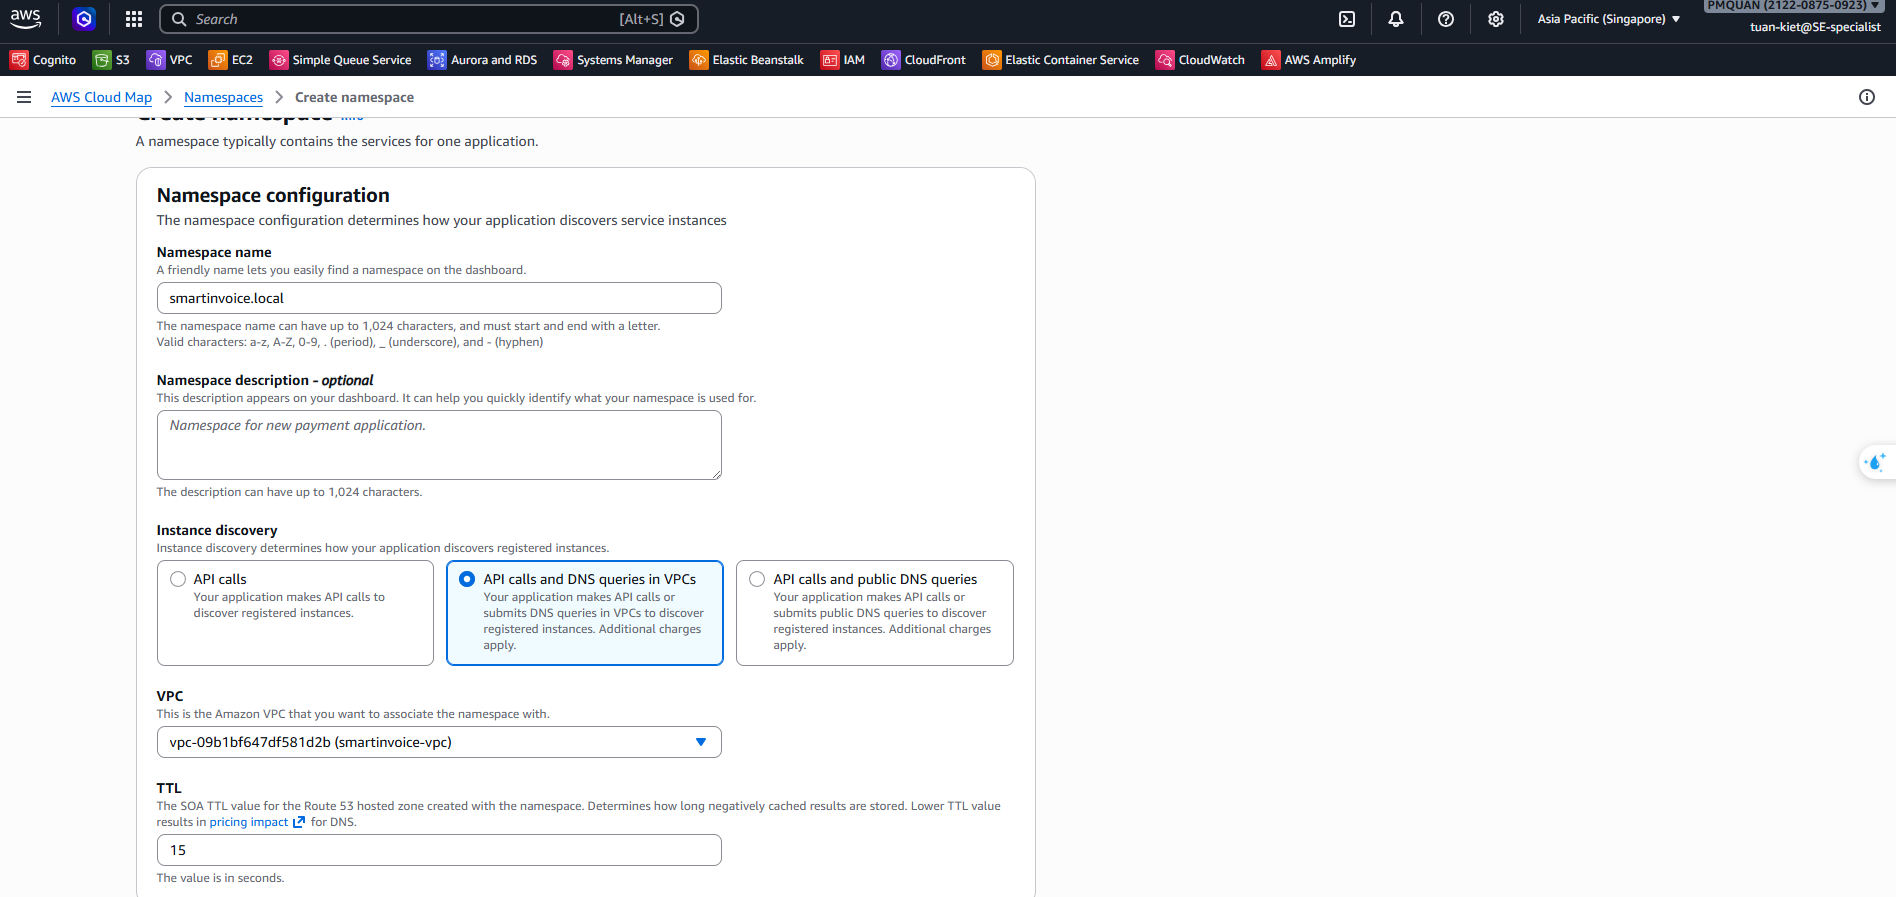
14.3 Create Cloud Map Namespace
[!TIP] Cost Saving: Cloud Map allows services to discover each other via internal DNS (e.g.,
ocr.smartinvoice.local), saving approximately $18/month by eliminating the need for an Internal Load Balancer.
Console: AWS Cloud Map → Create namespace
| Field | Value |
|---|---|
| Namespace name | smartinvoice.local |
| Instance discovery | API calls and DNS queries in VPCs (Private) |
| VPC | smartinvoice-vpc |
14.4 Service Discovery Configuration
When creating the ECS Service in the next step, AWS will automatically register the IP addresses of your running tasks into the ocr.smartinvoice.local domain name. This allows the Backend to call the OCR service directly.
14.5 Deploy ECS Service
Console: ECS → Clusters → smartinvoice-cluster → Services → Create
A. Compute configuration
- Compute options: Capacity provider strategy
- Strategy: Use custom (Advanced) → Fargate spot (Cost saving: 50-70%) (Weight: 1, Base: 0)

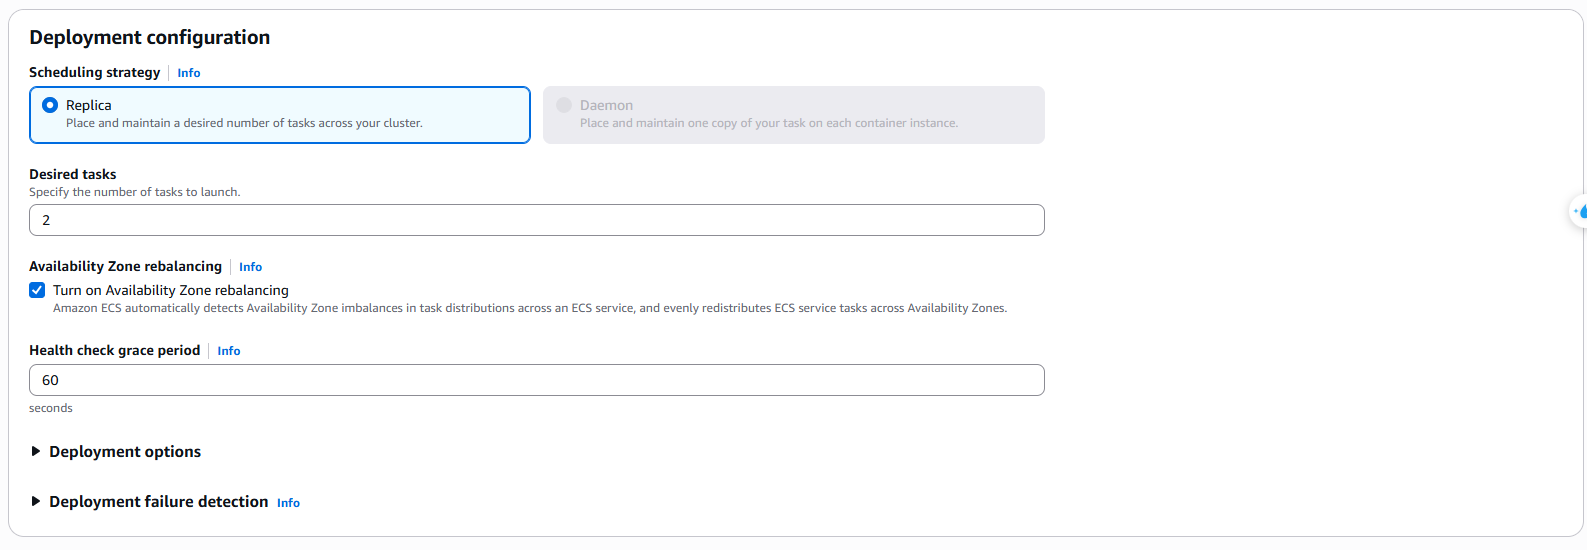
B. Deployment configuration
- Application type: Service
- Task definition: Family
smartinvoice-ocr-task(LATEST) - Service name:
smartinvoice-ocr-task-service - Desired tasks:
2 - Deployment controller: Rolling update
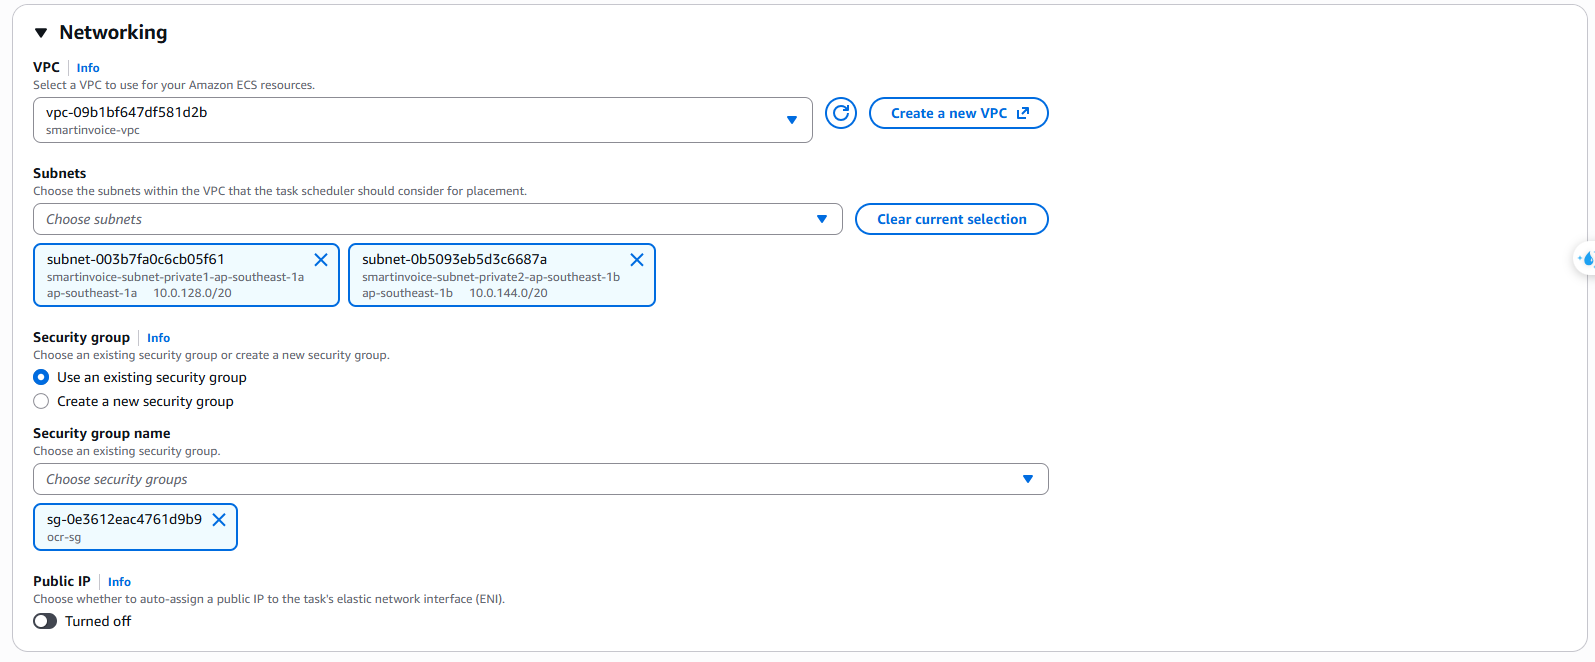
C. Networking
- VPC:
smartinvoice-vpc - Subnets: Select both Private subnets (1a, 1b)
- Security group:
smartinvoice-ocr-sg - Public IP: ❌ Turned off (required for Private Subnet)
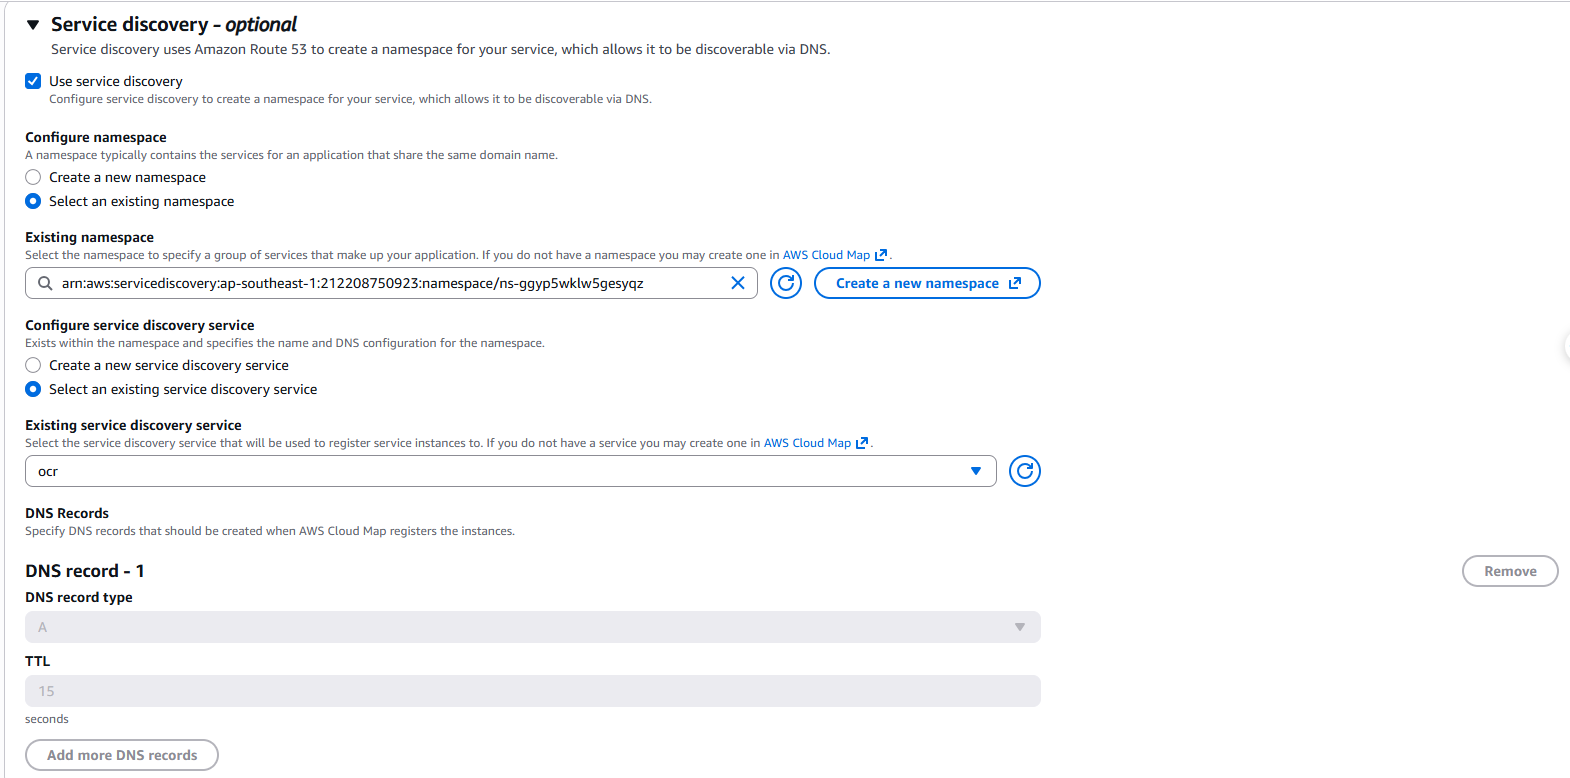
D. Load balancing & Service discovery
- Load balancing: Select 🔵 None (to save costs).
- Service discovery:
- Use service discovery: ✅ (Check this).
- Namespace: Select
smartinvoice.local. - Service name: Enter
ocr. - DNS record type: Select
Arecord. - TTL:
15/60seconds.
→ Click Create ✅. Once the Service is Running, update the /SmartInvoice/prod/OCR_API_ENDPOINT parameter in SSM to http://ocr.smartinvoice.local:5000.
Step 15: Deploy Backend on Elastic Beanstalk
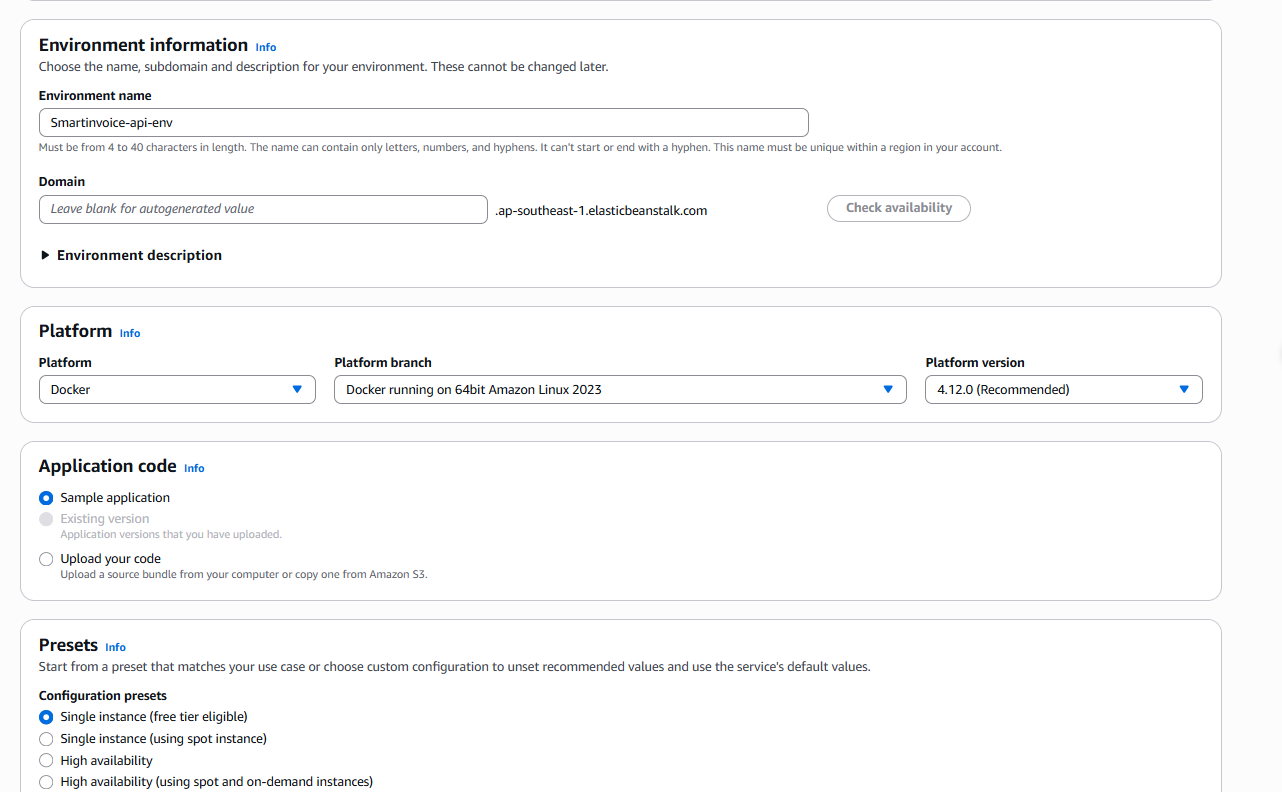
15.1 Step 1: Configure Environment
| Field | Value |
|---|---|
| Environment tier | Web server environment |
| Application name | Smartinvoice-api |
| Environment name | Smartinvoice-api-env |
| Platform | Docker |
| Platform branch | Docker running on 64bit Amazon Linux 2023 |
| Application code | Sample application (CI/CD will deploy later) |
| Presets | Single instance |
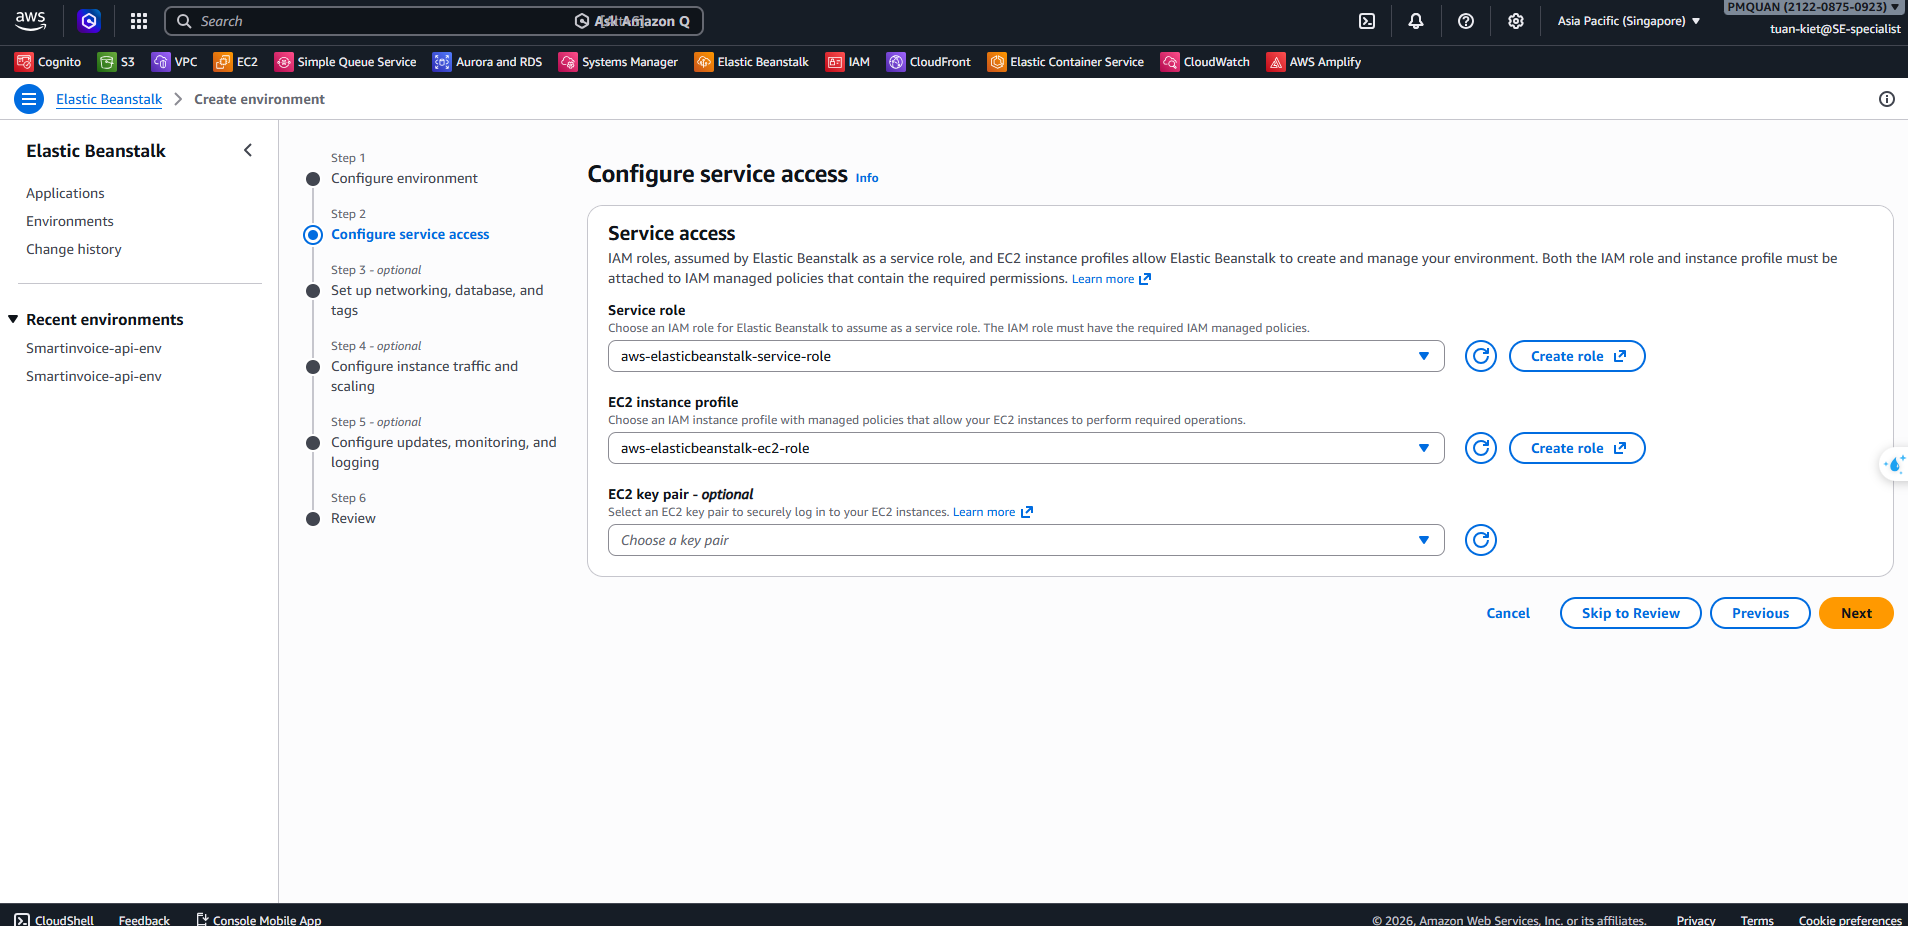
15.2 Step 2: Configure Service Access
| Field | Value |
|---|---|
| Service role | aws-elasticbeanstalk-service-role |
| EC2 instance profile | aws-elasticbeanstalk-ec2-role |
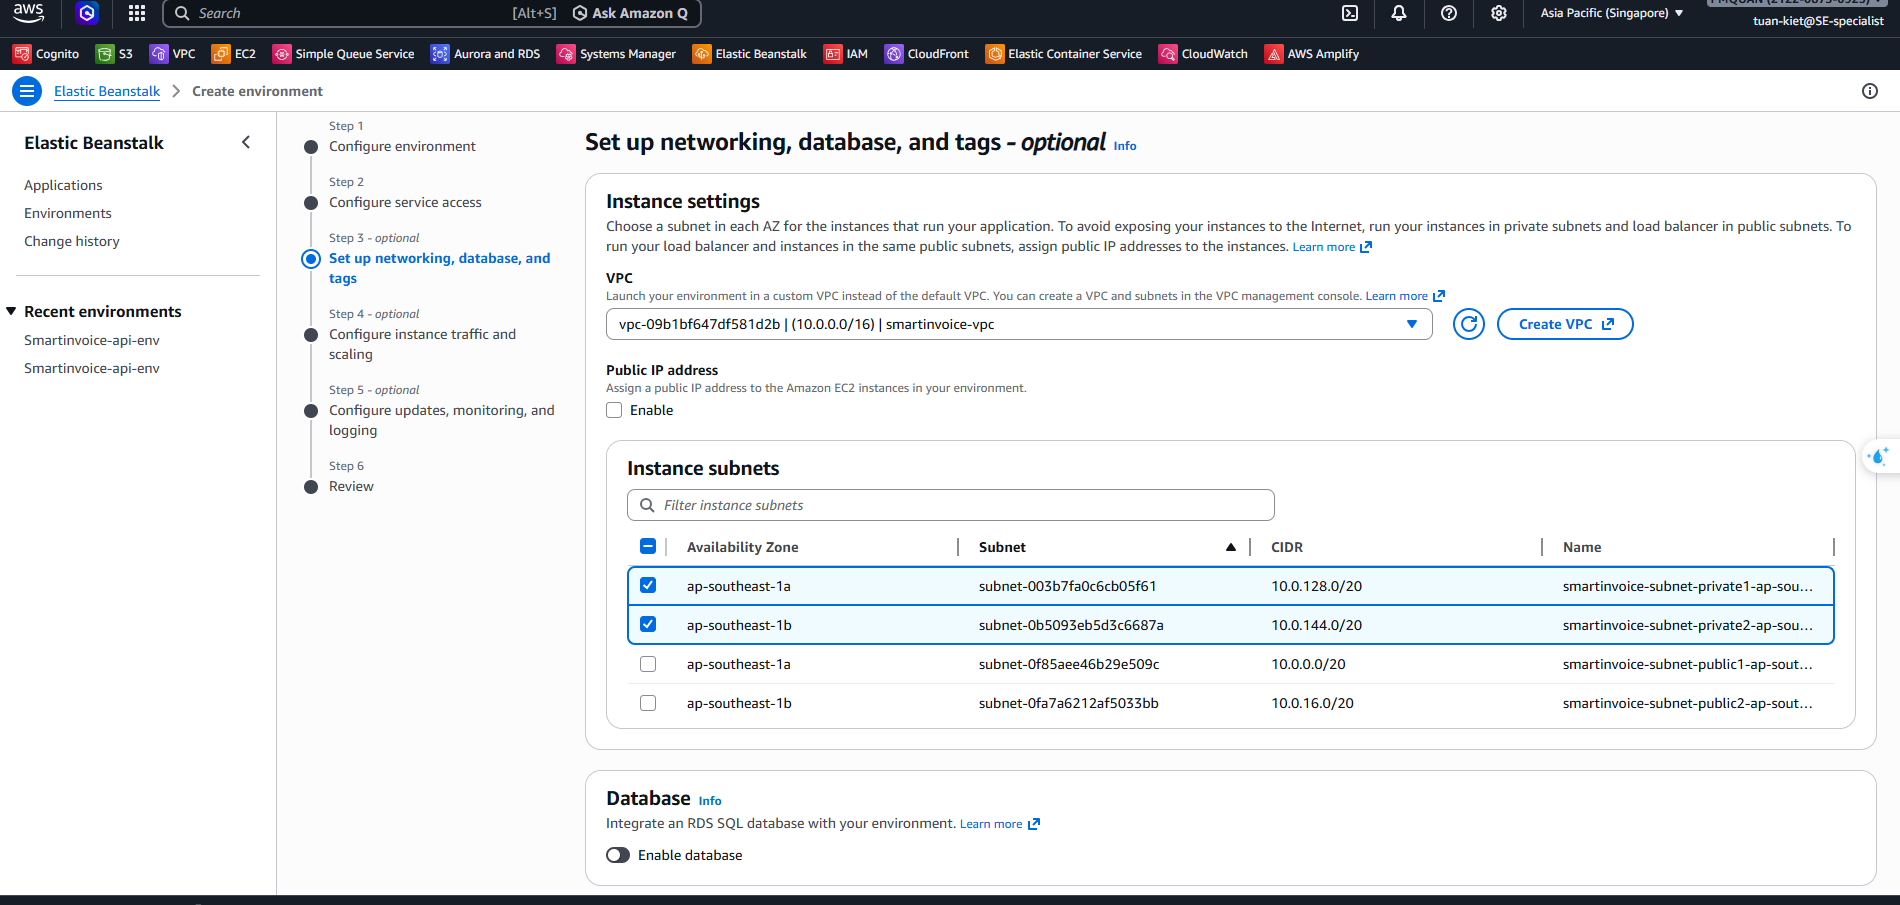
15.3 Step 3: Networking
| Field | Value |
|---|---|
| VPC | smartinvoice-vpc |
| Public IP address | ❌ Do NOT enable |
| Instance subnets | Private subnets (1a + 1b) |
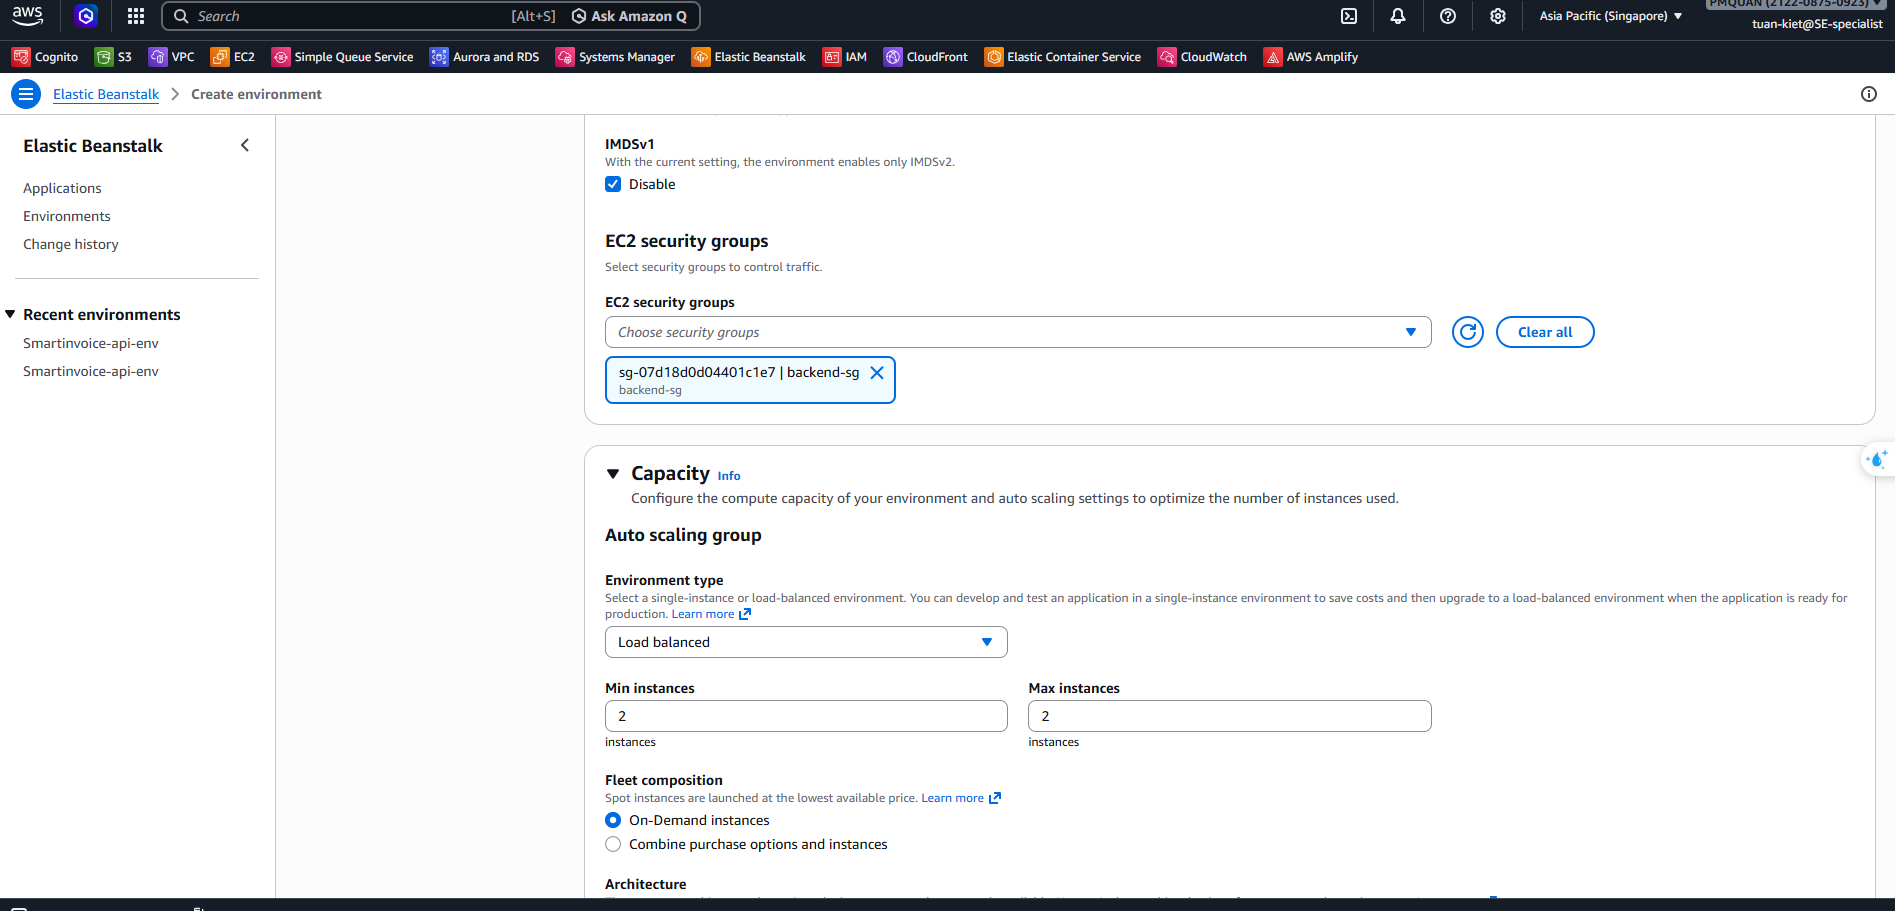
15.4 Step 4: Instance Traffic & Scaling
| Field | Value |
|---|---|
| IMDSv1 | ✅ Disable |
| EC2 security groups | smartinvoice-backend-sg |
| Environment type | Load balanced |
| Instance type | t3.micro |
| Scaling Min / Max | 2 / 2 |
15.5 Step 5: Monitoring
- Monitoring:
Basic(orEnhancedfor detailed metrics)
15.6 Step 6: Review & Create
Click Submit and wait 5–10 minutes for the environment to be provisioned.
15.7 Dockerrun.aws.json (for CI/CD)
After the environment is ready, this file is used by GitHub Actions to deploy code from ECR:
{
  "AWSEBDockerrunVersion": "1",
  "Image": {
    "Name": "<ACCOUNT_ID>.dkr.ecr.ap-southeast-1.amazonaws.com/smartinvoice-backend:latest",
    "Update": "true"
  },
  "Ports": [
    {
      "ContainerPort": 8080,
      "HostPort": 80
    }
  ]
}